Build your own arduino car
For DIY enthusiasts, it is possible
to build an Arduino car using more or less the same principles as before,
without needing the pre-made chassis presented in China.
wheelbase:
5.32 inches - Maximum support width:
5.51 inches - Support length:
9 inches

Additional material, modules
and components used for building the car:
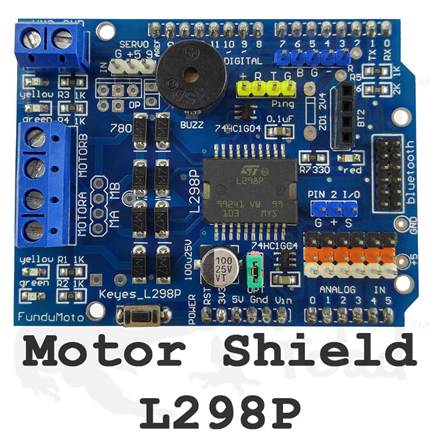
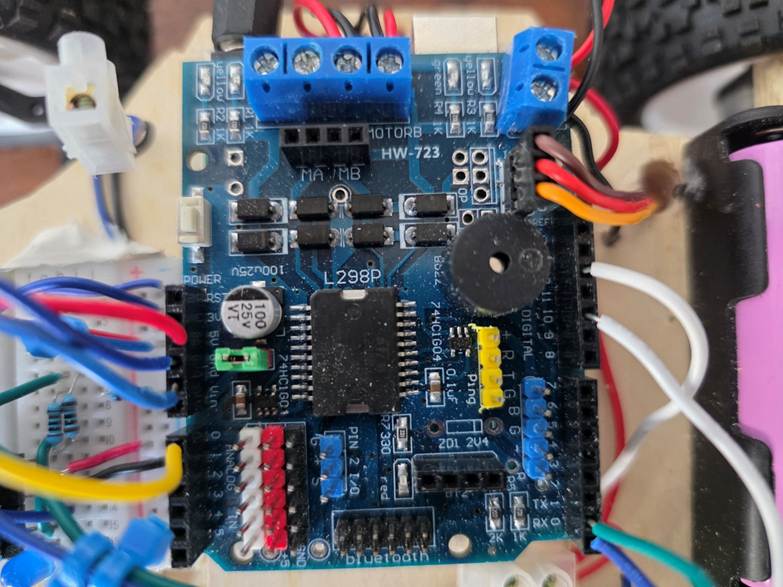
We
will be using an Arduino Uno board, onto which we will attach an L298P motor
shield with a built-in buzzer. This
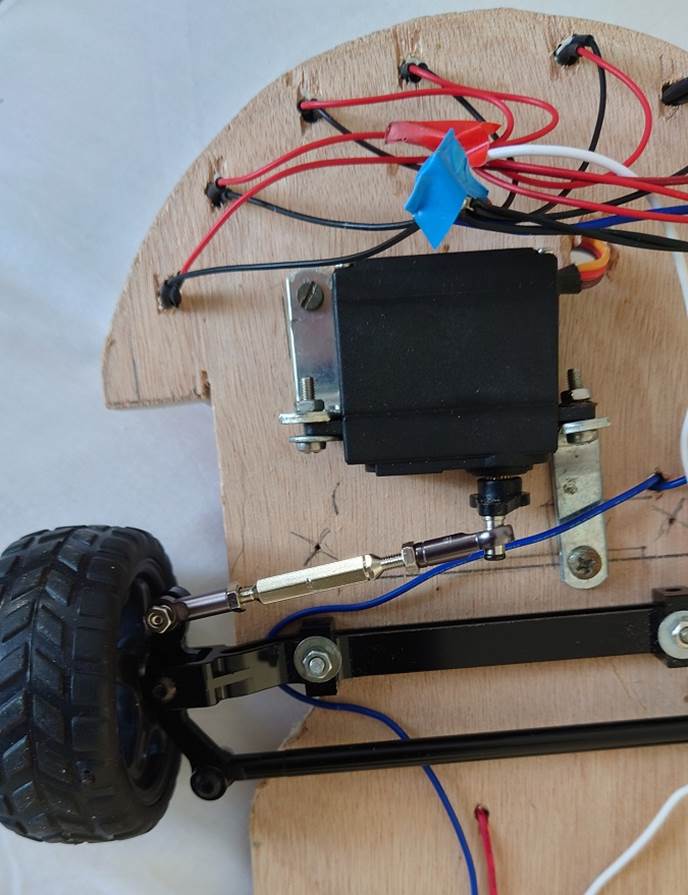
shield will have the necessary connections for the servo motor (steering) and
the two motors.
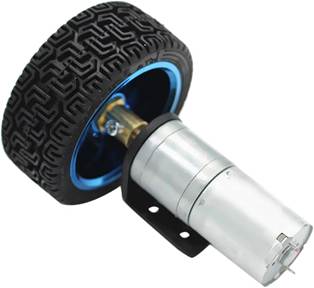

Rear-mounted
motors with mounting brackets and wheels included
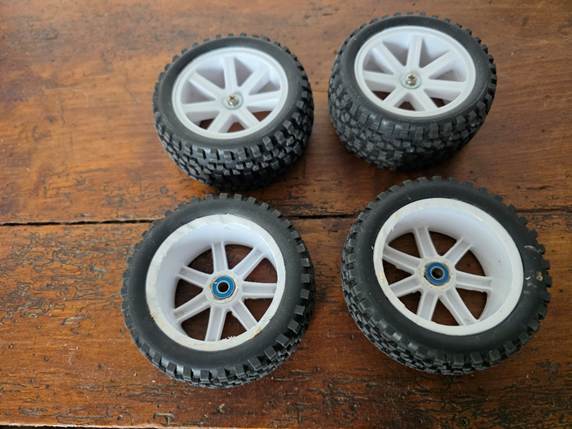
We
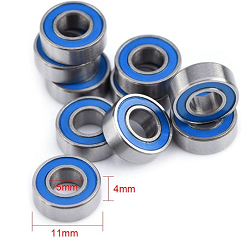
modify the front wheels by using 2 small ball
bearings per wheel to fix them to the steering bar.


- An Arduino UNO R3 or similar board
- An
L298P motor shield with integrated buzzer and dedicated connections for the
servo and the two motors
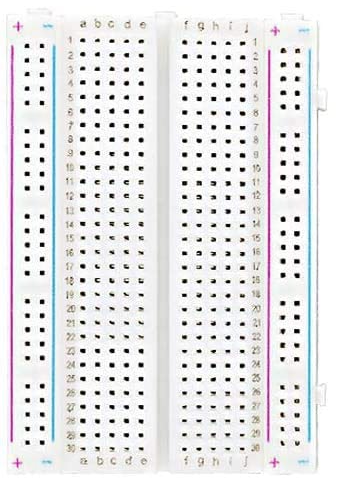
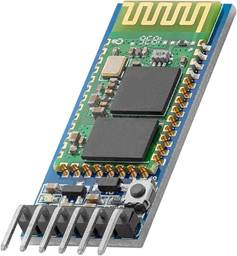
- A
quarter-inch breadboard for the HC-05 Bluetooth module and the small test
button
- An
HC-05 Bluetooth module
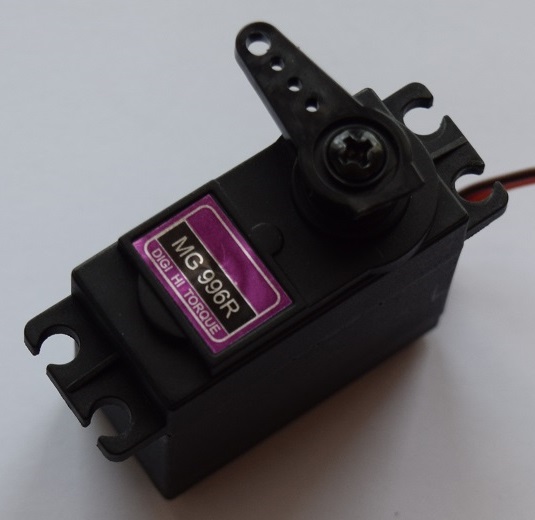
- An
MG 996R servo with cables and accessories (arms and screws) to control the
front steering (We attach it under the board used as a base in front of the
steering bar)
-
Two motors to power the rear wheels
-
Four wheels
The
two front wheels will be reversed, drilled, and modified with two mini-bearings
that will fit onto the steering bar axles.
Suitable
nuts and washers will be needed
The
rear wheels are attached with hexagonal brass brackets supplied with the motors
and an external screw.
- 4
mini ball bearings 0,196 x 0,43 x 0,157 inches (2 per front
wheel)
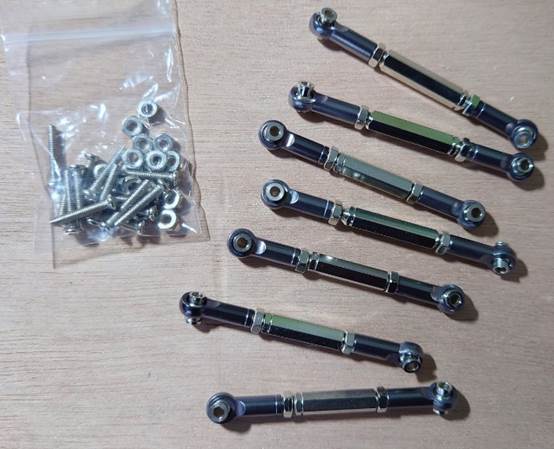
- Complete
pre-assembled steering rod (5,51 inches wheel spacing)
-
One steering linkage
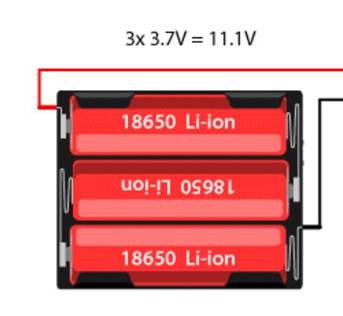
-
One holder for 3 18650 Li-ion lithium batteries
-
Three 3.7-volt 18650 Li-ion rechargeable batteries
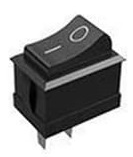
-
One main switch
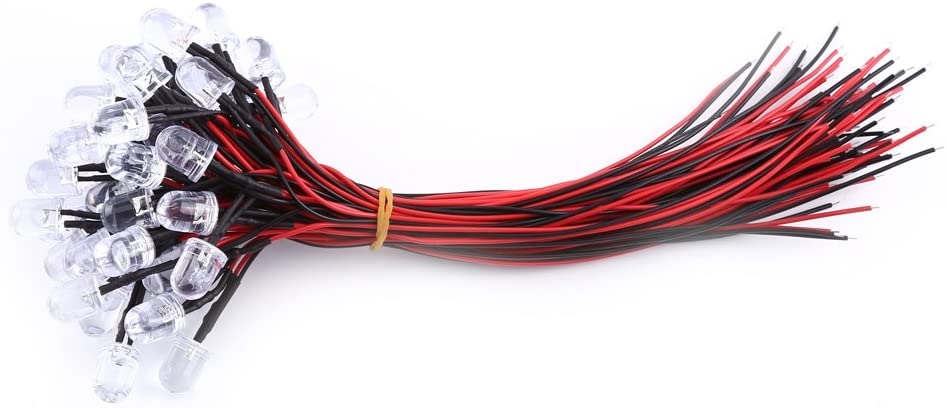
-
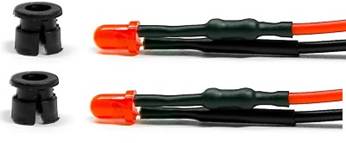
Three 1KΩ resistors, one 220Ω resistor, one blue LED, white LEDs for
the front, red LEDs for the rear
-
Colored wires, jumpers for the various connections between all these components
-
The bracket will be cut from a 1 cm thick sheet of plywood
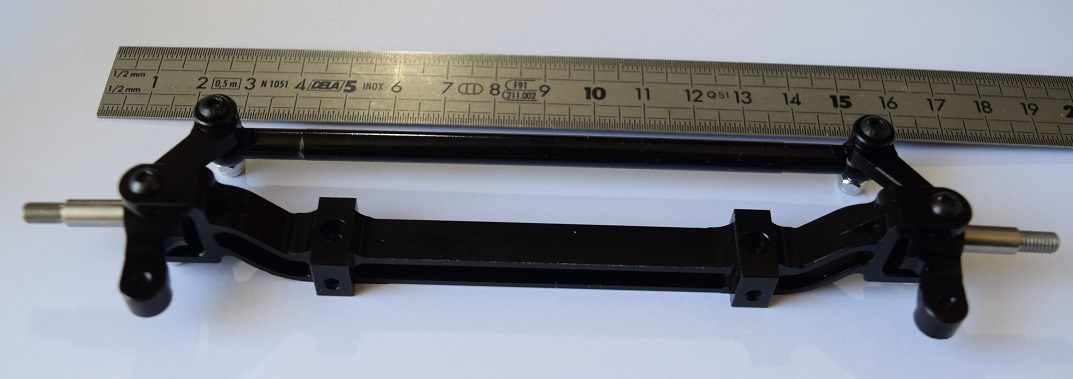
Allow a spacing of
5,51 inches (14 cm) between the front wheels and therefore the rear wheels to
cut your support board accordingly

A link will be fixed between the servomotor and
the steering bar
The Arduino B4R program will be slightly modified since we are now
managing two rear motors instead of one, but the scenario remains the same, and
therefore the B4A smartphone application remains exactly the same as before
with the car and chassis. The test button will produce exactly the same
results:
- The front wheels will turn right then left before aligning in a
straight line.
- The vehicle will move forward for 3 seconds and then backward for 3
seconds.
- The installed lights and the
integrated buzzer will turn on and off several times.
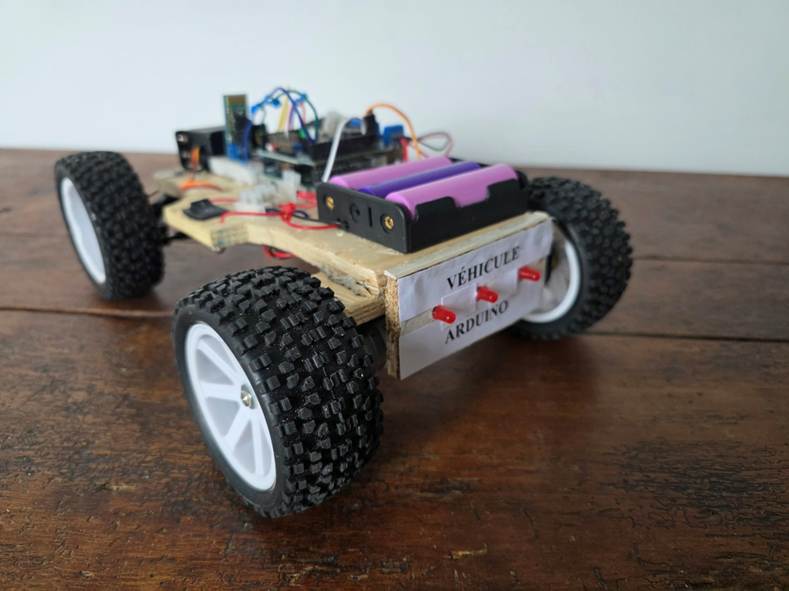
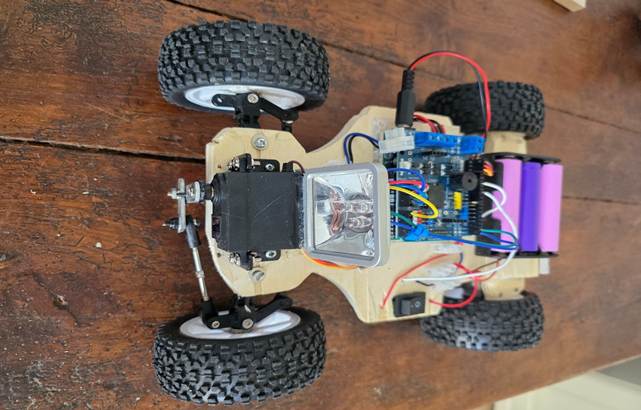
A prototype created using DIY methods, in working
order.
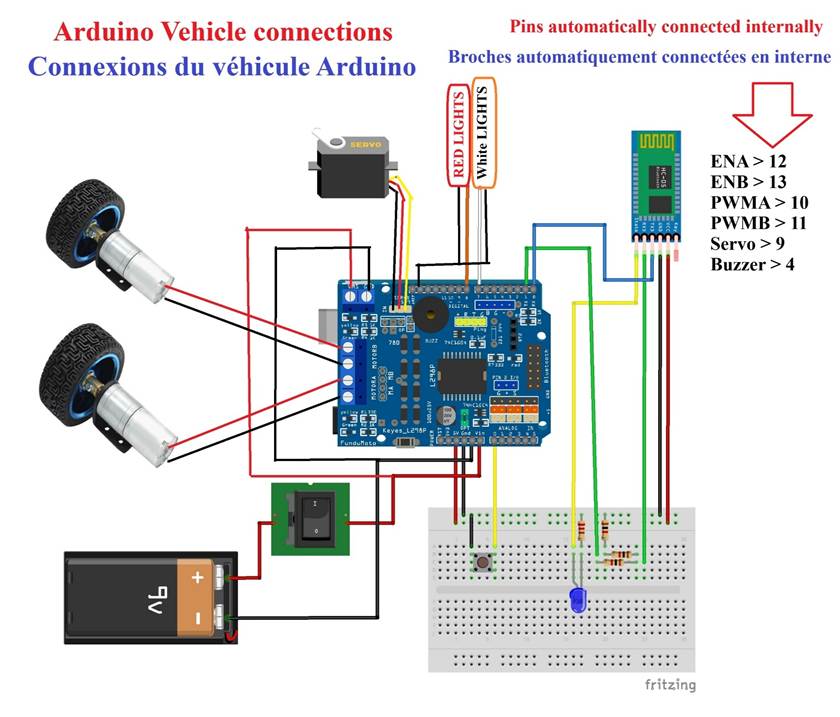
General diagram of the
connections between the various components of the Arduino car
Video >>> TESTS yellow button and Bluetooth control